 minute read
Check Out Devices via Imprivata Locker
Applies to iOS devices.
Supported in the MAM 8.0 User Acceptance Test (UAT) environment.
Download a PDF of this guide.
Over the air (OTA) checkout ("Grab and Go") enables users to check out iPhone and iPad devices without requiring Launchpad computers or Smart Hub charging hardware. This supports deployments that do not require physical Check Out infrastructure.
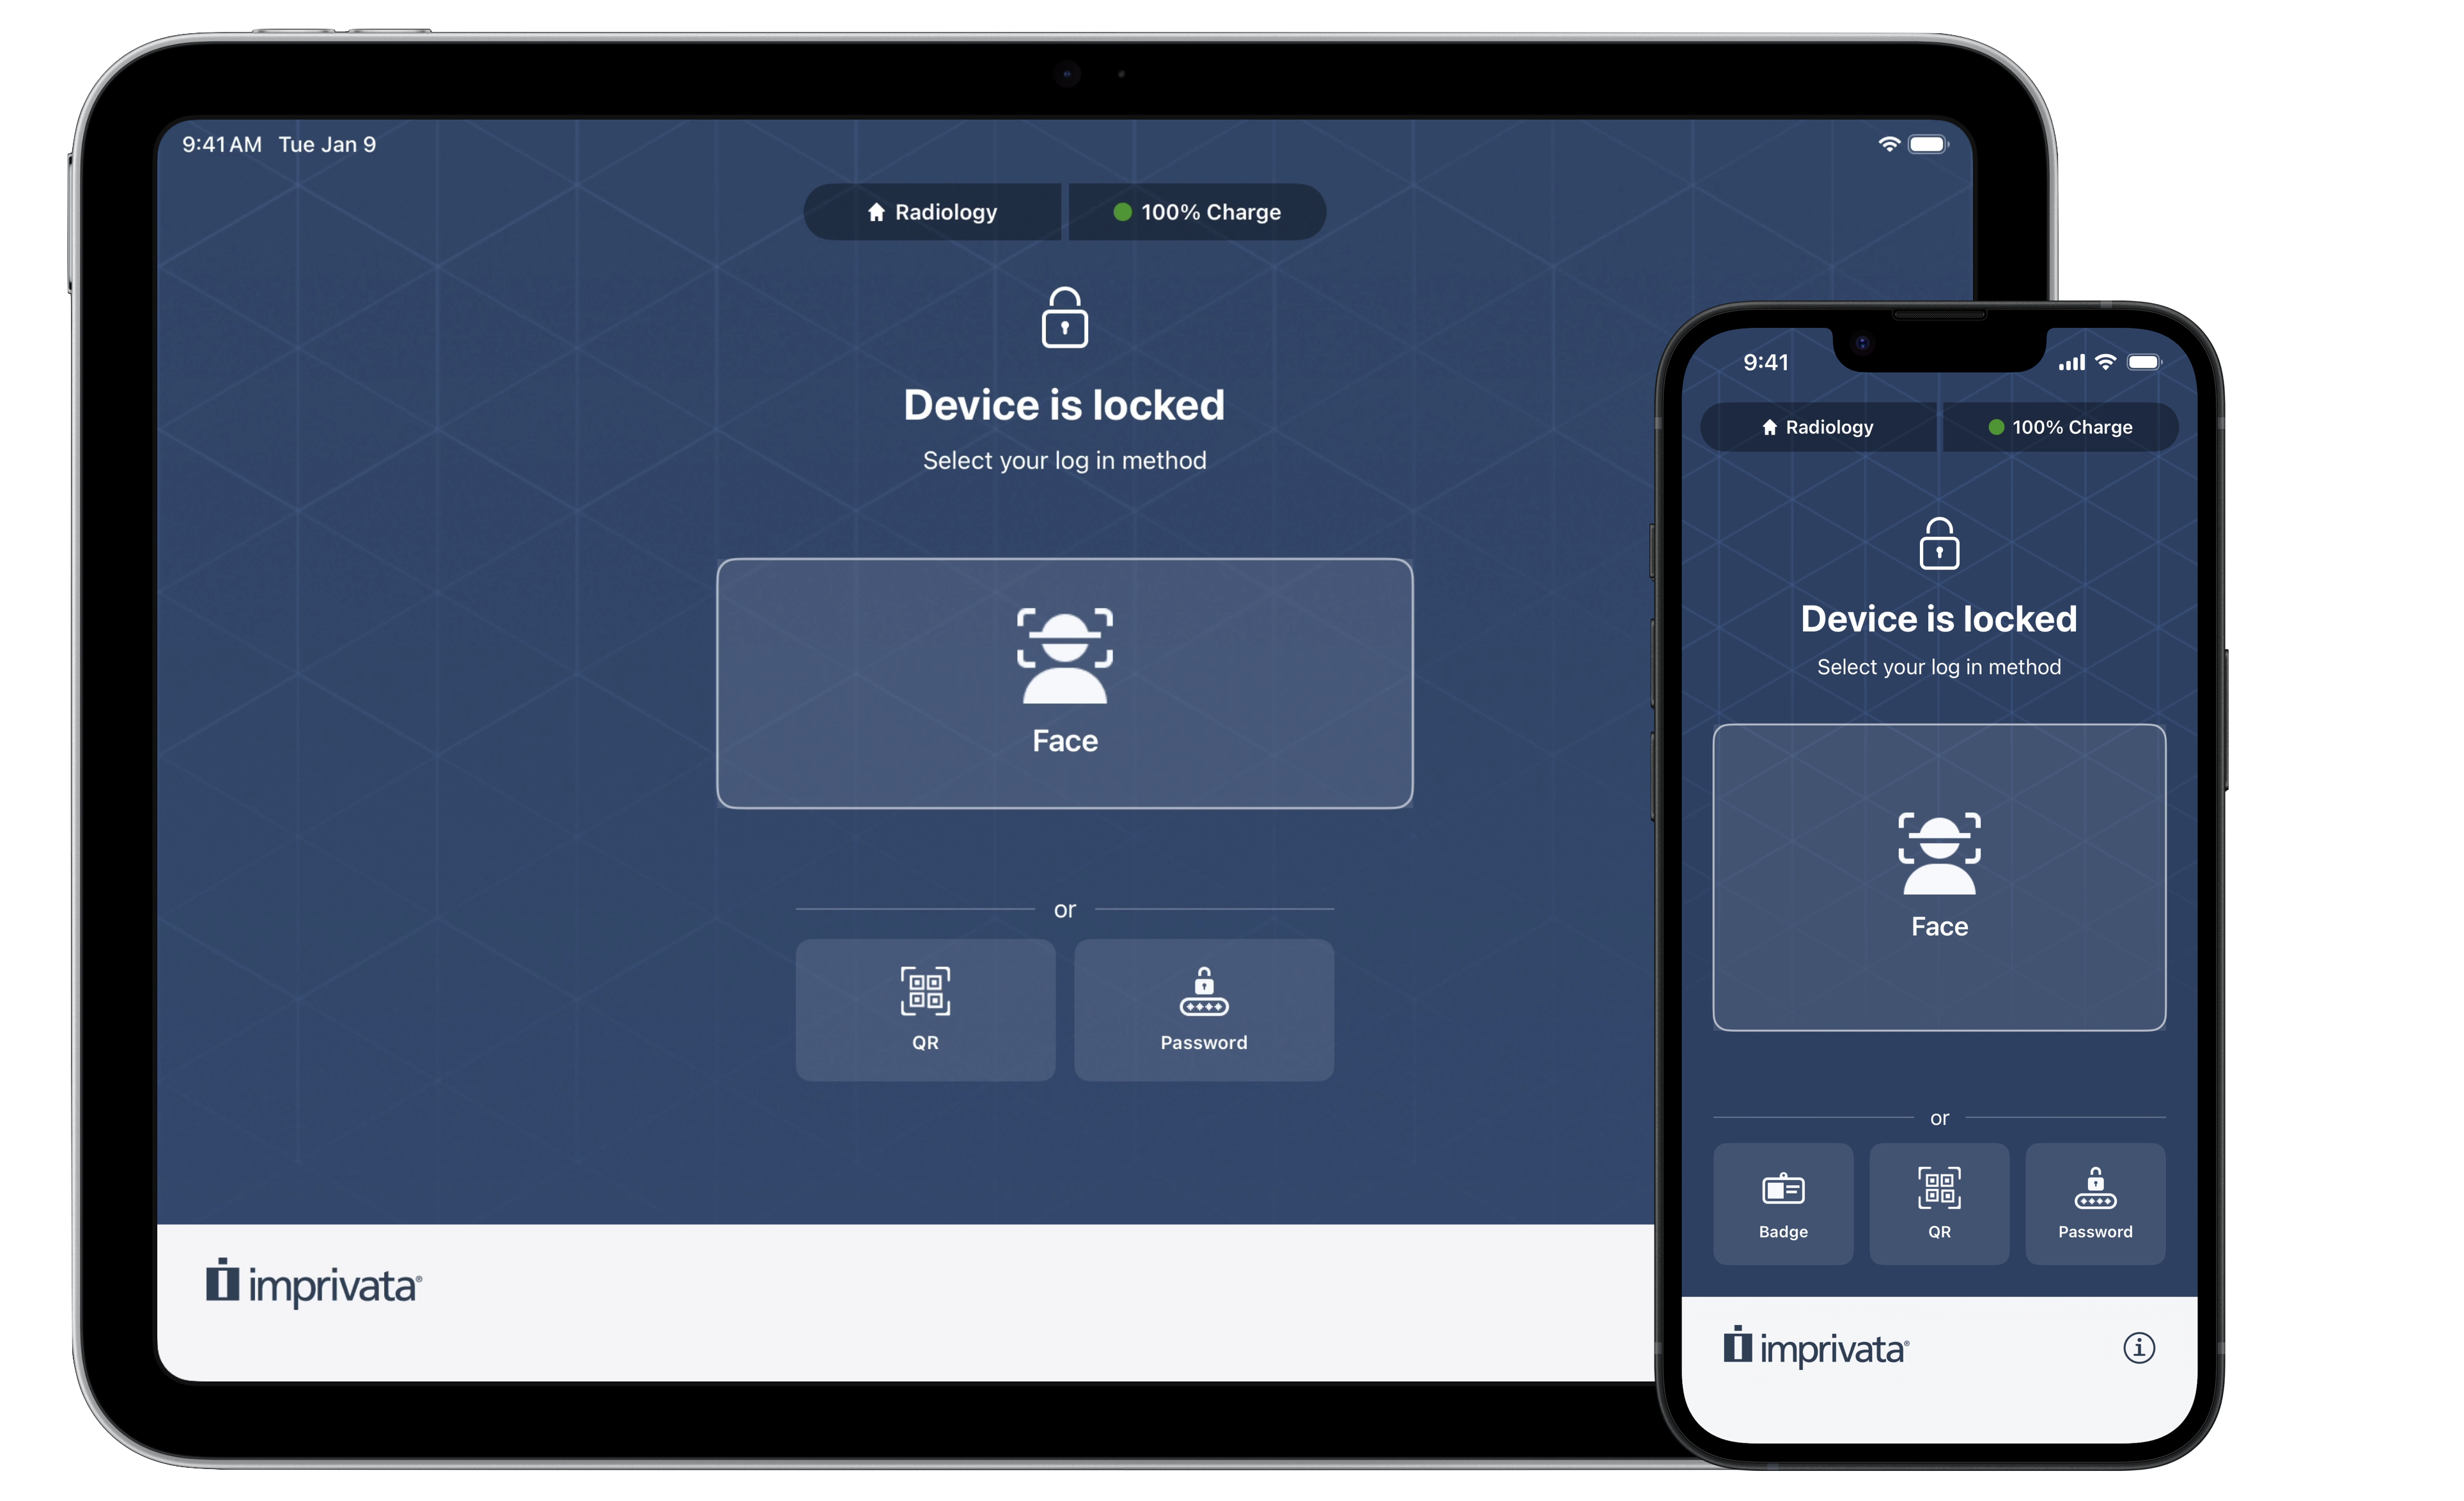
With traditional Launchpad-based Check Out ("Tap and Go"), users tap their badge on a card reader attached to a Smart Hub. With Grab and Go, users authenticate directly on the iOS device itself via badge tap (NFC), face recognition, QR code scan, or username/password entry from any location.
-
All checkout events are logged in the Activity tab with the authentication method used (badge, face, QR code, or username/password) recorded for audit purposes.
-
This feature can be used alongside standard Launchpad-based Check Out workflows and devices can still be provisioned by a Launchpad.
-
Grab and Go devices must be initially provisioned and checked in to a Launchpad.
-
Devices can be used with or without device level passcodes.
Assumptions
This guide assumes that your MAM organization is already configured in the following manner:
-
Imprivata enabled the Check Out feature for your organization.
-
You have met the prerequisites for the Check Out and Password AutoFill features, including appropriate Imprivata licensing.
-
You configured the integration with Imprivata Enterprise Access Management.
-
The Imprivata appliances in your Imprivata enterprise must be running EAM 25.2 or later.
For more information on upgrading your Imprivata appliances, see the Imprivata Upgrade portal.
Requirements
The Grab and Go feature requires the following:
-
MAM 8.0 or later.
-
Imprivata Locker iOS 5.0 and later.
-
iOS devices running a supported version of iOS/iPadOS.
-
Requires device internet connectivity to the MAM server.
-
Face recognition:
-
For additional details on requirements and configuration tasks for face recognition, see Face recognition as an authentication method.
-
The user must grant access to the device's camera to use face recognition.
-
-
NFC badges:
-
iPhone 15 and later with NFC reader mode.
-
Badges must be ISO/IEC 14443 Type A compliant by using the 13.56 MHz MIFARE NFC Frequency. If your current badges do not support this frequency, there are two options available:
-
Replace existing badges with new badges that support dual frequency (both 125 kHz and 13.56 MHz).
-
Attach stickers to the badges to allow for 13.56 MHz frequency to be read. When adding a sticker that supports the 13.56 MHz frequency, configure the EAM user policy to allow more than one badge per user. For more information, see Integrate with Imprivata Enterprise Access Management.
-
-
-
QR codes:
-
QR codes must be generated externally. This task is beyond the scope of this documentation.
QR codes may be generated from badge IDs exported from Imprivata Enterprise Access Management or can be generated in GUID standard format and enrolled in Locker.
Example
Export badge
12345from EAM and generate a QR code forbadge:12345.Alternately, generate a GUID such as
fc1cb445-7d4a-4253-817c-1b15f32ba67eand then generate a QR code forbadge:fc1cb445-7d4a-4253-817c-1b15f32ba67e. -
The user must grant access to the device's front facing camera.
-
Supported Authentication Methods
The following table illustrates the supported authentication methods:
| Authentication Method | Notes |
|---|---|
| Face recognition |
Users check out a device using their face, but must follow up by using a second factor to authenticate.
|
| NFC badge tap |
Users check out a device by tapping their badge on the device. Users can enroll their badge during device checkout, if it is enabled in Admin > Check Out. |
| Username and password |
Users check out a device using their username and password. |
| QR code |
Users scan their QR code as a first factor to check out a device, but must follow up by using a second factor to authenticate. |
Supported Badge Types
Locker supports tapping an NFC enabled badge to check out on compatible iPhone models with compatible badge types.
| Badge Type |
|---|
| ISO 14443 A |
| NTAG 213/215/216 |
|
MIFARE DESFire EV1/EV2/EV3 (UID read only) |
Interactions with Other MAM Features
The Grab and Go feature interacts favorably with other MAM features:
-
Devices checked out via Locker are displayed in the Device Home Dashboard.
-
Passcode-locked devices. Department Managers can clear the passcode from an abandoned device. Clearing the passcode does not sign the user out of apps.
With the device in their possession, the Department Manager must then open Locker and check in the device or return it to a Launchpad.
-
App sign-in using Enterprise Password AutoFill or OpenID Connect (OIDC).
-
Personalized Lock Screen using Live Activities.
-
Checking the device out starts the overdue timer; check in clears an Overdue status.
-
Devices marked as out of service (using the Out of Service device attribute) cannot be checked out. An administrator must change the device's status.
Limitations
-
iPads do not contain NFC reader hardware, but can be used with QR Code or Face to check out.
-
Over the air (OTA) Workflows remove all other actions when the Check Out action is added.
-
You cannot mix an OTA Check Out action with non-OTA actions in the same automation chain.
-
Grab and Go does not support the ability to force quit apps on device check in.
-
Check In via Locker must be initiated manually by the user tapping the Logout button in the Locker app. It cannot be checked in over the air remotely from the MAM server.
Configure Check Out and Check In
 Step 1: Create the Check Out Workflow
Create an OTA Check Out Workflow and set up its associated automation rule.
-
In Name, enter Checked Out - OTA.
-
In Description, enter Check out iOS devices.
-
For Workflow Model, select Over the Air.
-
Select Add an action > Check Out Device.
-
Click Save.
Automation Setup
-
Go to Automation > New Rule.
-
In Name, enter Checked Out with Locker App.
-
Set a new trigger when a device is: Checked Out with Locker App.
-
Deploy these workflows:
-
Checked Out - OTA.
Step 2: Create the Check In Workflow
Create an OTA Check In Workflow and set up its associated automation rule.
-
Go to Workflows > New Workflow.
-
In Name, enter Check In - OTA.
-
In Description, enter Check in iOS devices using Locker.
-
Select the Workflow Model: Over the Air.
-
Click Add an action > Check In Device.
-
From Logout Actions, select the apps to log the user out from.
NOTE:Device passcodes are cleared during check in as long an MDM is enabled in device passcode management.
-
Click Save.
Automation Setup
-
Go to Automation > New Rule.
-
In Name, enter Check In with Locker App.
-
Set a new trigger when a device is: Checked In with Locker App.
-
Deploy these workflows:
-
Check In - OTA.
The Check In - OTA action must be the first Workflow in an automation chain.
Step 3: Configure Check Out Settings
To configure the Grab and Go feature at the global level in your organization, configure the Check Out settings:
-
In the MAM console, go to Admin > Check Out.
-
In the Check Out via Locker section, switch the toggle to ON.
-
In the Select Authentication Methods section, select the authentication methods as needed for your organization:
-
Proximity badges.
-
To allow users to enroll their badges at checkout, select Allow users to enroll badges to Enterprise Access Management from Locker app.
-
-
Network username and password.
Some organizations use special terms for username, such as "Network ID", "Net ID", or similar. You may customize the terms you use by editing the Username Label and Password Label fields.
When enabled, the Locker app lock screen adds a button for users to type their network username and password to unlock the device.
For EAM enterprises configured with multiple domains, the user selects their correct domain from a list box of domains.
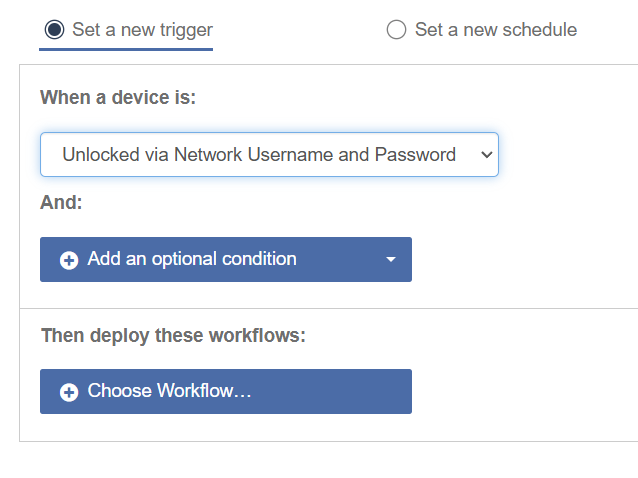
On successful checkout, Mobile Access Management can automate a Workflow. The automation must use the trigger When devices are unlocked via Network Username and Password, and the Workflow use the Over the Air Workflow model.
-
Face authentication. For more information, see Face Recognition as an Authentication Method.
NOTE:When using Face to check out via Locker, the user must be assigned to an EAM user policy that allows either Face + Imprivata PIN or Face + Password. Using Face as a first factor will always prompt the user for a second factor (Imprivata PIN or password) regardless of grace period.
-
QR code.
-
-
Ensure the Require a second factor to unlock the device setting is ON.
-
Set the Locker Custom Options to allow the device to go to sleep at the Locker lock screen. This allows the devices to significantly reduce their battery usage.
-
Copy
{
    "AllowDeviceAutoLock": true
}
If you already have Locker Custom Options defined for your devices, you can add this key/value pair to the JSON as an additional line:
Copy{
"UnlockPIN": "9999",
"DefaultDomain": "example.com",
"AllowDeviceAutoLock": true
}
Step 4: Configure Check In Settings
Configure the ability to Check In via Locker as the corresponding behavior.
-
In the MAM console, go to Admin > Check In.
-
In the Check In via Locker section, switch the toggle to ON.
This allows users to log out of the device by tapping the Logout button in the Imprivata Locker app.
Step 5: Test Your Devices with the Authentication Methods
Test a small subset of your devices before deploying the authentication methods enterprise-wide by setting Locker Custom Options. Your testing can cover the following scenarios:
-
Testing one or more devices before enabling a specific authentication method organization-wide.
-
Enabling a Locker authentication method organization-wide, but excluding a specific group of devices.
Requirements
-
The Check Out via Locker toggle must be set to ON for the Imprivata Locker app to respect the Locker Custom Options set for authentication methods.
Considerations
-
The authentication method Locker Custom Options override any authentication methods set globally in the Admin > Check Out > Check Out via Locker > Select Authentication Methods section.
-
Locker Custom Options are applied after the device is next checked in, when the device is locked and not actively performing any actions.
-
Locker Custom Options key/value pairs are in JSON format.
IMPORTANT:The key portion of Locker Custom Options key/value pairs are case-sensitive. The values may be case-insensitive.
| Authentication Method | Locker Custom Option Key | Value | Description |
|---|---|---|---|
|
NFC Badge tap |
AuthMethodBadgeAllowed
|
Boolean |
Allows badges for device check out.
|
AuthMethodBadgeEnrollmentAllowed
|
Boolean |
Allows the user to enroll their badge during device check out.
|
|
| Username and password | AuthMethodPasswordAllowed
|
Boolean |
Allows user name and password for device check out.
|
| QR code scan | AuthMethodQRAllowed
|
Boolean |
Allows QR code scan for device check out.
|
| Face recognition | AuthMethodFaceAllowed
|
Boolean |
Allows face for device check out.
|
| Over the air check in allowed | OTACheckInAllowed
|
Boolean |
Allows users to log out of the device by tapping the Logout button in the ImprivataLocker app.
|
Add Locker Custom Options to a Single Device
To apply the authentication method Locker Custom Options to a single device:
-
In the MAM console, go to Devices, and select the specific device from the Devices list. In the Device Details dialog, click Custom Options.
-
Click Edit, enter the key/value pairs in JSON format for the allowed authentication methods and click Save.
JSON Syntax
Copy{
"AuthMethodBadgeAllowed": true,
"AuthMethodBadgeEnrollmentAllowed": true,
"AuthMethodQRAllowed": true
}If you already have Locker Custom Options defined for your devices, you can add these key/value pairs to the JSON as additional lines:
Copy{ "UnlockPIN": "9999",
"DefaultDomain": "example.com",
"AuthMethodBadgeAllowed": true,
"AuthMethodBadgeEnrollmentAllowed": true,
"AuthMethodQRAllowed": true
} -
Click Deploy Workflow to deploy to the device.
Add Locker Custom Options to Multiple Devices
To apply the authentication method Locker Custom Options to multiple devices at once, add a Custom Options action to the Check Out Workflow:
-
In the MAM console, go to Workflows.
-
Select the Checked Out - OTA workflow.
-
Click Add an action > Advanced > Locker Custom Options.
-
Enter the key/value pairs in JSON format for the allowed authentication methods.
-
Click Save Workflow and deploy to the devices.


