Configuring Imprivata Confirm ID if You Do Not Have Imprivata OneSign
Complete the steps described in the following sections to configure Imprivata Confirm ID.
Establish and Configure the Imprivata Confirm ID Enterprise
The Imprivata Confirm ID enterprise is a group of Imprivata appliances that synchronize their databases and are configured to work together to service a collection of endpoint computers. All appliances in an enterprise share the same users, policies, and enrollments.
Your enterprise is automatically created when the first appliance is configured. See Establishing the Imprivata Enterprise
After you add the first appliance to the enterprise and configure enterprise settings, it is important to add a second appliance immediately. See Adding an Appliance to the Enterprise
Configure System Properties and Settings
Configure system properties and settings:
- Review system settings, including where to post system status logs, logging level, and the default refresh interval (for Imprivata agent logging).
- Configure audit record retention and audit log backups
-
NOTE: Imprivata retains audit information related to e-prescribing controlled substances for a minimum of two years per DEA regulations, or for longer depending on your state regulations.
To modify the amount of time for which Imprivata Confirm ID audit records are retained, change the Preserve regulated audit records setting in the Record maintenance section of the Settings page (Imprivata Admin Console > gear icon menu > Settings).
- Review mail server settings and message templates
- Configure Imprivata Confirm ID reports
- Configure event notifications
Allow Imprivata Confirm ID to Connect Outside The Firewall
Imprivata Confirm ID needs to contact remote communication sites to communicate with licensed services such as the Imprivata Cloud Token Service, the Imprivata Cloud, Insight, and log transmittal. For complete details, see About Outbound Communications.
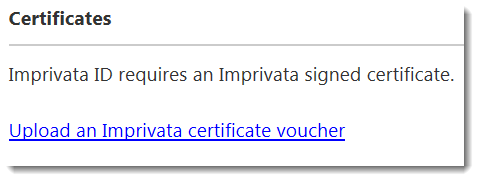
(Optional) Upload an Imprivata Signed Certificate to the Imprivata Appliance
If your providers will use Symantec tokens embedded in Imprivata ID for Hands Free Authentication, and you have not yet uploaded an Imprivata signed certificate to your enterprise, then complete the following steps
When your enterprise was licensed for Imprivata Confirm ID, Imprivata Services sent an email to your enterprise with a Certificate Voucher File (.IMPCVF) attached. This file is required to upload the Imprivata signed certificate and complete the integration.
- In the Imprivata Admin Console, go to the gear icon menu > Settings. The Settings page opens.
- In the Certificates section, click Upload an Imprivata certificate voucher.
-
- The Imprivata Certificate Voucher dialog box opens.
- If the Imprivata signed certificate for the enterprise is already installed, click OK.
- If the Imprivata signed certificate for the enterprise is not installed, browse to locate the IMPCVF file.
- Select whether This application authenticates users via LDAP (Active Directory) or This application does not use LDAP.
- Click OK.
Your EMR application is listed with the expiration date of the certificate. You can update or remove the certificate directly on this page.
NOTE: To complete this activation, the Imprivata appliance must have access to the Internet via HTTPS.
(Optional) Configure External OTP Tokens
If you are using external OTP tokens, see Configuring External OTP Tokens.
(Optional) Enable Integration with your EMR Application
You need to enable your EMR application to support authentication via Imprivata Confirm ID during supported signing workflows. See Integrate your EMR Application
(Optional) Enable Integration with your VPN Gateway
You need to configure your enterprise to support Remote Access authentication via Imprivata Confirm ID. See Remote Access: Before You Begin.
(Optional) Enable Integration with your Medical Devices
You need to enable your Medical Devices to support authentication via Imprivata Confirm ID. See Enabling Integration with your Medical Devices.
(Optional) Configure Supervised Enrollment
If your providers will be:
- e-prescribing controlled substances, and
- "Institutional providers" (not identity proofed by a Certificate Authority (CA) such as DigiCert, or a Credential Services Provider (CSP) such as Symantec Norton Secure Login)
Then by default, supervision is required to enroll their first facial biometric, fingerprint, OTP token, or Imprivata ID. Supervision of subsequent facial biometrics, fingerprints, OTP tokens, or Imprivata IDs for e-prescribing controlled substances is also enabled by default.
For more information, see Institutional Identity Proofing.
Enroll Users
After you complete the steps above, users can enroll their authentication methods for Imprivata Confirm ID workflows. See Enrolling Authentication Methods for Imprivata Confirm ID.