Vendor Onboarding Guide
Vendor Privileged Access Management (VPAM) is an Imprivata application that enables you to provide secure support through remote connections, known as sessions. The remote sessions connect you, a vendor representative (or Vendor Rep), to your customers assets. Your customers assets might include their data, their services (such as Software, Infrastructure, and Platforms), or their applications.
As a Vendor Rep, you connect to their assets through custom Gateway applications that your customer configures for you. All of your activities in their assets are monitored by the VPAM server to provide detailed activity logs and ensure asset safety. Features available to you depend on your assigned role and the configuration defined by your customer.
This guide describes the process to connect to your customer's VPAM server and initiate sessions to provide remote support. This guide contains the following topics:
Workstation System Requirements
Vendors and Vendor Reps must meet the following system requirements to access their customer's VPAM server:
-
System Requirements
-
Java 8
-
1 GHz of CPU
-
1 GB of disk space
-
200-250 MB for application installation, backups, and logs
-
500 MB of free space for future upgrades
-
512 MB of RAM
-
-
Network Requirements
-
Outbound ports SSH (22), HTTP (80), and HTTPS (443).
-
-
Supported Operating Systems
-
Windows 10 and 11
-
Red Hat (including Alma, CentOS, and Rocky) 8 and 9
-
Ubuntu 20.04, 22.04, 24.04
-
SUSE Enterprise Server 10, 11, 12, 15, 15.5
-
Unix
-
-
Supported Web Browsers
-
Microsoft Edge
-
Google Chrome
-
Mozilla Firefox
-
Safari
-
Vendor Self-Registration
To use the Vendor Self-Registration, your customer must enable this feature in their VPAM server. Some VPAM customers may not to enable self-registration, so reach out to them and ask to have a new Vendor Rep user account created for you.
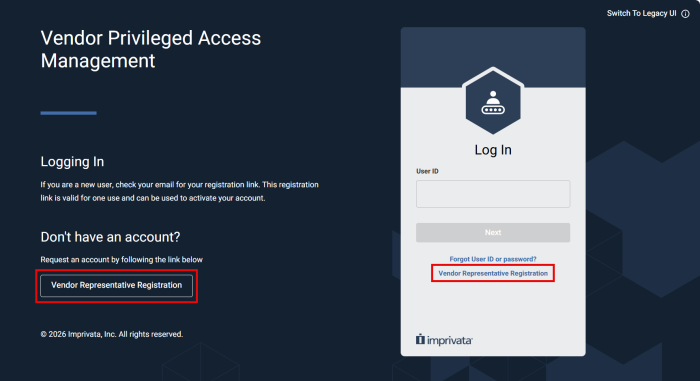
VPAM System Administrators can enable the Vendor self-registration, shown in the UI as the Vendor Representative Registration. This self-registry enables you to log in to your customer's VPAM server by registering your company email and completing an information form.
Start your Vendor Self-Registration by clicking Vendor Representative Registration:
Complete the self registration form:
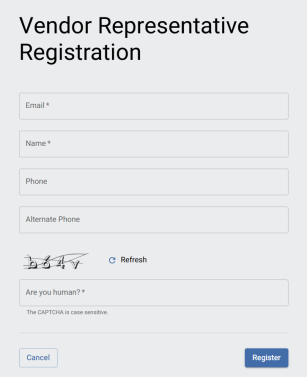
Use your personal company email address, as VPAM customers place security restrictions to generic addresses (such as
sales, support, or similar) and email domains (such as @gmail.com, @yahoo.com).The email, name fields, and CAPTCHA fields are mandatory.
When you complete your registry, you will receive an Account Activation message to the email you input in the form.
Access Your Account
Accessing a Vendor Rep VPAM account requires you to have an email address with a domain associated to a Vendor organization. The Vendor-associated email is always the Vendor Rep's User ID.
The Vendor Rep email or User ID is set up either:
-
During the Vendor Representative Registration workflow, or
-
During the Vendor and Vendor Rep setup by the VPAM System Administrator.
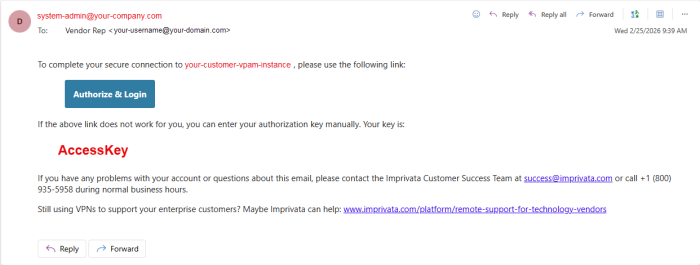
When your customer configures their VPAM account, they will create a Vendor profile for your organization. Within the Vendor profile, your customer will also create profiles for each individual team member as Vendor Reps. When your Vendor Rep profile is created, you will receive an account activation email shown below:
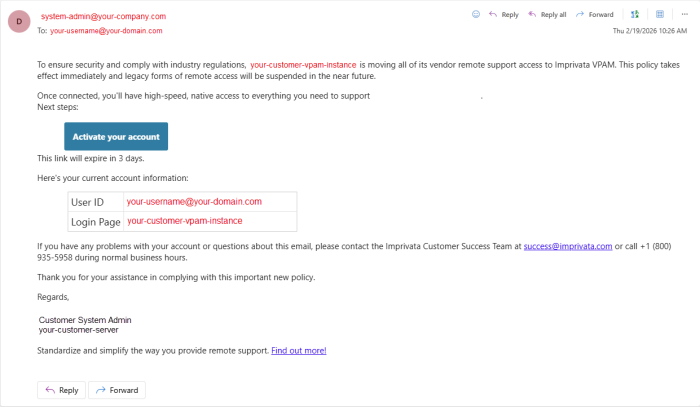
To activate your account, click Activate your account. This will redirect you to your customer's VPAM server.
Remember that your full Vendor-associated email is considered your User ID for all your interactions with your customer's VPAM server.
Complete the authentication process and continue to select a password. After you select a password, navigate to the Login Page and use your credentials to log in.

As an additional security measure, VPAM enforces that every log in attempt with accurate credentials is followed up by requesting an Authorization Key. The Authorization Key functions as an employment verification that ensure the Vendor Rep signing in is currently employed by a registered Vendor in VPAM.
Therefore, whenever a Vendor Rep inputs their correct User ID/email and password, they are redirected to the Email Authorization page:
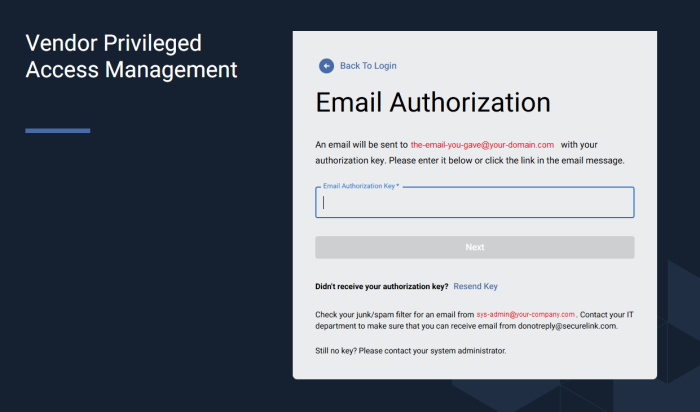
Fill the form with the authorization key you receive in your email:
VPAM customers can enforce an additional mobile authentication step when their internal users and Vendor Reps log in to the server. If your customer configures Mobile Authentication, follow these steps:
-
Download a mobile authenticator application, such as Microsoft Authenticator, Google Authenticator.
Talk to your company's IT department to ensure you comply with their standards. -
Launch the application when you log in to the VPAM server.
After you input your credentials, the system displays a QR code and notifies you that Mobile Authentication is needed. -
Scan the QR code with the mobile authentication application.
These steps link your VPAM user account with the mobile application.
The next time you log in, you can introduce the six-digit code displayed in the mobile authentication app to complete your sign in process.
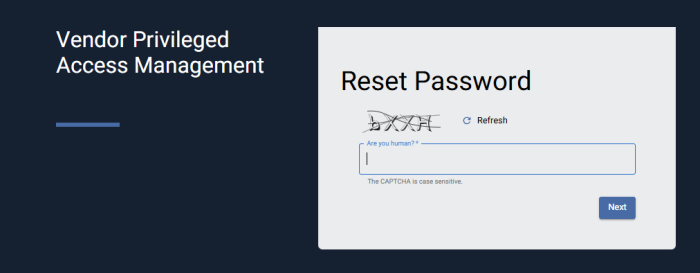
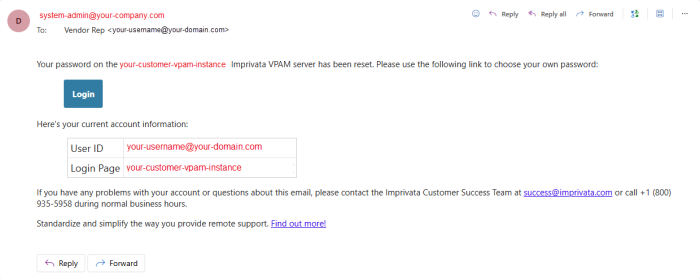
If you forget your User ID or password, click Forgot User ID or password? at the bottom of the login form. The system prompts you to type your email. If the system finds an account that matches, you receive an email from your system administrator with instructions to reset your password.
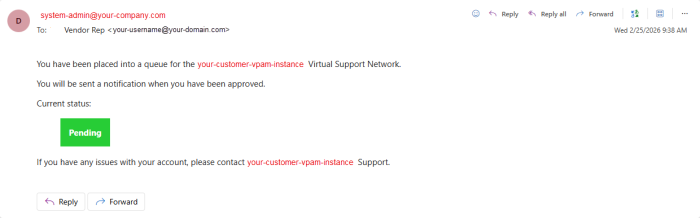
VPAM System Administrators may configure Access Request rules for each of their Gateway applications. These configurations influence how you log in to the VPAM server. If the VPAM System Administrators configure an Access Request rule, when you input your credentials in the Log In Page, you may be redirected to an Access Request page:
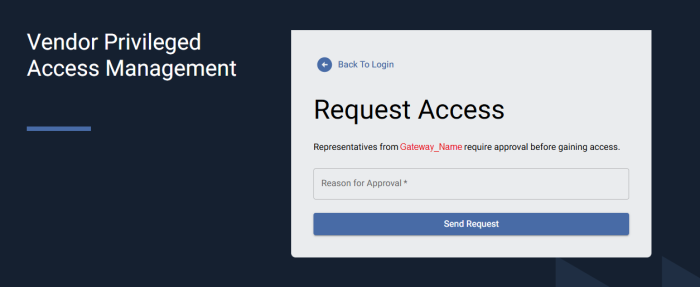
After you submit your request, you receive an email notification of the status of your request:
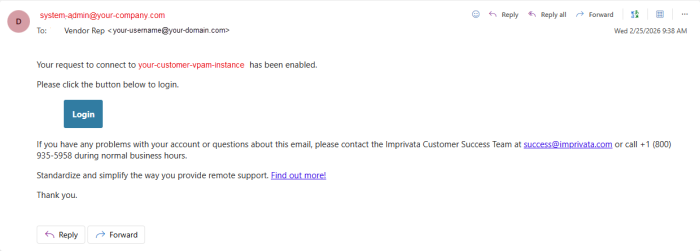
When your VPAM System Admin approves your request, you can continue to access your customer's VPAM server:
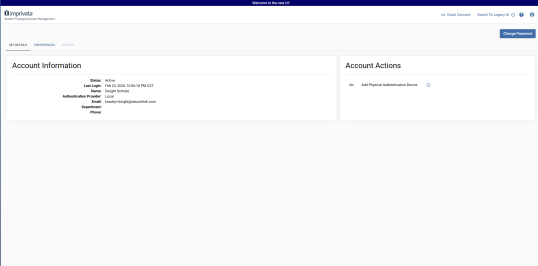
From version 25.1.1, VPAM has a new User Interface (New UI) aimed to improve your experience with your customer's assets. The layout is designed to provide visibility into the active assets to which you have access.
All features are available in the New UI and the Legacy UI. If you decide, you can toggle between the New UI and Legacy UI by clicking Switch to Legacy UI on the top-right corner of your instance, as shown in the following image:

After you log in, you have access to the Vendor Rep instance shown in the following image:
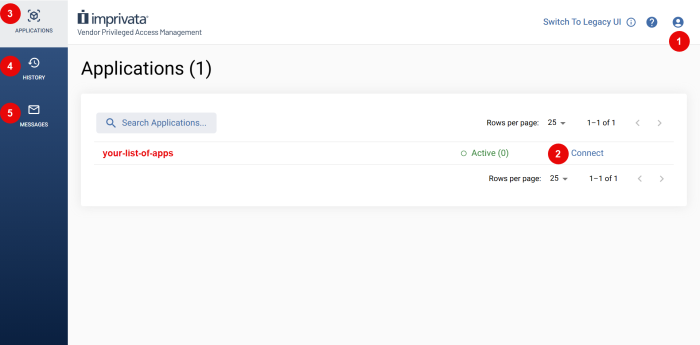
In the Vendor Rep instance, you have access to the following features:
| # | Feature | Available actions |
|---|---|---|
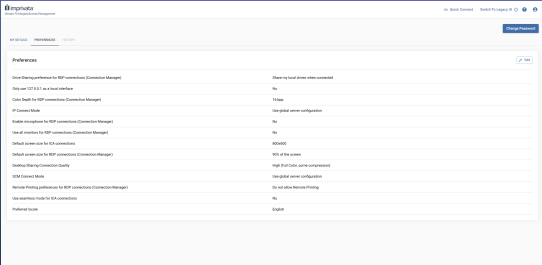
| 1 | Your Profile |
Log Out of the VPAM server. Access your profile information, including your account's DETAILS and PREFERENCES:
|
| 2 | Connect to Application | Click to begin a session. Read the Session Types section before you click Connect. |
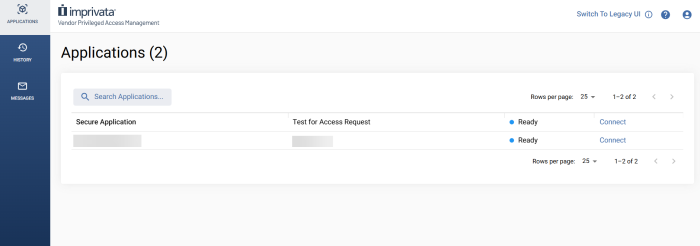
| 3 | APPLICATIONS Menu | Display the list of available applications, their status, and Connect. |
| 4 | HISTORY Menu | Display a list of all the connections you have run to your customer's assets. |
| 5 | MESSAGES Menu | Display a list of all the messages you have received from the server. |
Session Types
Depending on your customer's configuration of their VPAM server, Vendor Reps can have the following types of sessions:
Read the difference between an SSH and RDP Session using the Connection Manager and a Browser-Based Session.
The Connection Manager is a component that enables the secure connection of a Vendor Rep to their customer environment through the VPAM server. The Connection Manager creates the connection between Vendor Reps and customers through an SSH tunneling in the customer’s Gateway.
Click here to learn more about Gateways.
To start a session using the Connection Manager, follow these steps:
-
Click Connect for the Application you need.
 NOTE:
NOTE:
If your customer configured an access requests, click Request Access or Request Enable and wait for approval. -
Select Download and Run Connection Manager.
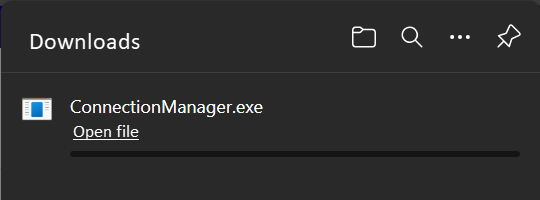
Your browser downloads theConnectionManagerfile.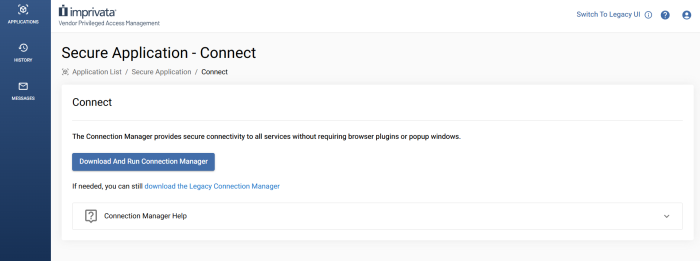
-
Open the file that downloads from your browser.
-
Click Start Connection if the session does not start automatically.
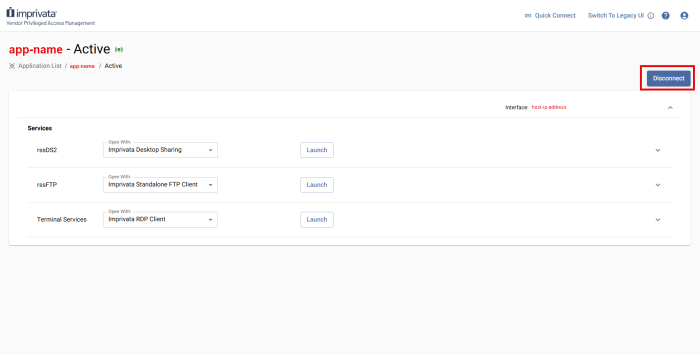
You are redirected to the Active Session page
-
Locate the Service you want to run and select the client you want to run it with.
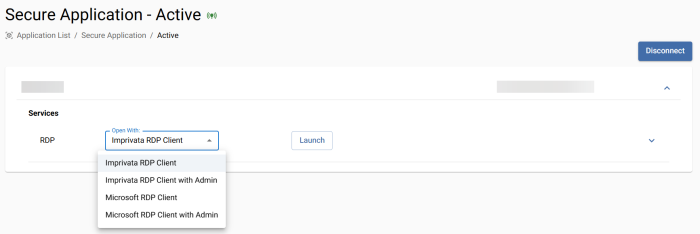 NOTE: Consider that Imprivata Clients enable credential injection; while Microsoft Clients do not support credential injection, but provide greater compatibility.
 -
Read the Credentials section to learn how to use the configured credentials in Services that may require them.
Alternatively, you can connect to your customer's assets with Browser-Based Sessions
If your customer has configured the option, you can run sessions with the Browser-Based client. The Browser-Based client enables you to run sessions through your preferred web browser. With Browser-Based sessions, you do not need to download or run the Connection Manager, as your session automatically starts in a new tab.
Credentials must be attached to Browser-Based sessions to launch. If you can not launch a browser session, review the Credentials section
To start a Browser-Based Session follow these steps:
-
Click Connect for the Application you need.
NOTE:
If your customer configured an access requests, click Request Access or Request Enable and wait for approval. -
Select Connect Using Browser.
This method may not provide all of the available services that the Connection Manager does.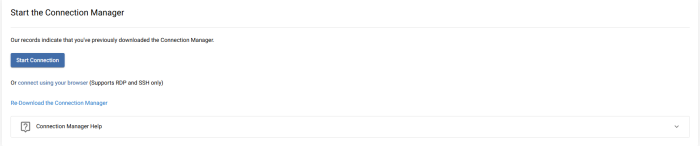
-
Click Start Connection if the session does not start automatically.
You are redirected to the Active Session page. -
Run the Browser-Based Service.
-
Read the Credentials section to learn how to use the configured credentials in Services that may require them.
Quick Connect sessions allow Vendor Reps to initiate secure, attended access only remote sessions with a customer. Quick Connect is designed to provide zero-install desktop sharing, enabling you to initiate a screen sharing session without requiring Vendor Reps or the customer to pre-install software.
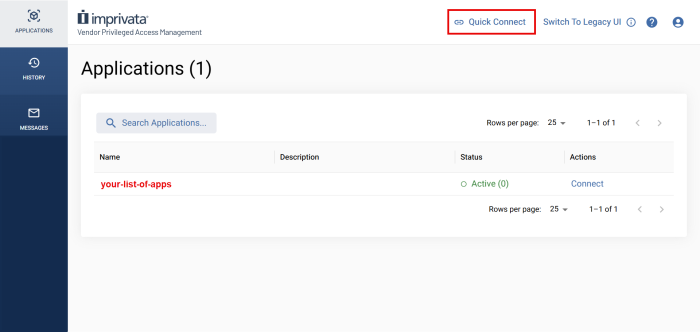
To use Quick Connect, the VPAM System Administrator has to configure the component for your account. You can identify if you have access to Quick Connect sessions by locating Quick Connect in your VPAM instance:
By default, Quick Connect sessions include the following built-in services:
-
Desktop Sharing
-
File Transfer (FTP)
To initiate a Quick Connect session:
-
Click Quick Connect at the top of your VPAM instance.
The Quick Connect page opens: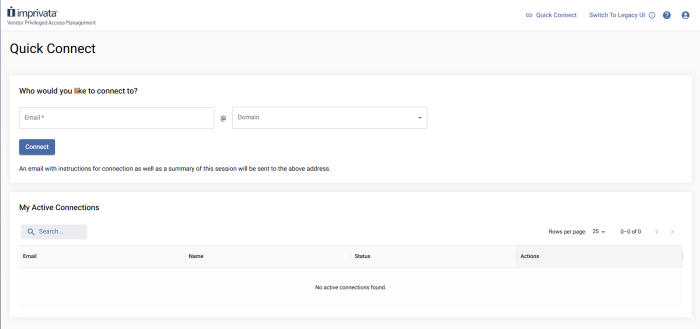
-
Provide the email and use the drop-down menu to select the domain of the customer that will receive your connection.
The user's domain must be authorized by your customer. -
Click Connect.
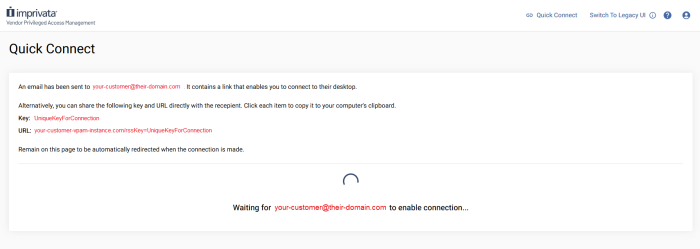
The Quick Connect Form opens:

-
Complete the form and click Start Connection.
-
Wait for your customer to approve the connection:
When your customer inputs the session key, you are redirected to the Services page, where you can Launch the Desktop Sharing and the FTP services.
Alternatively
Your customer may also initiate a Quick Connect session with you. They follow the same procedure, and you receive the following email to approve the connection:
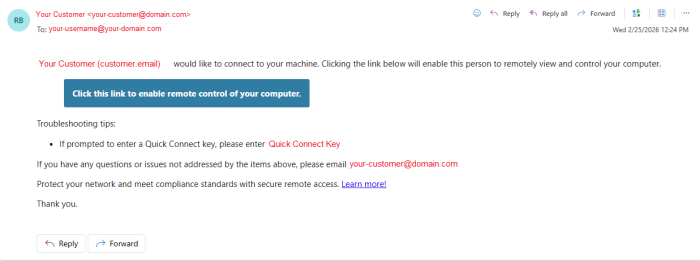
After you enable the remote control of your computer, you are redirected to the Connection Manager to run the session.
The Nexus enables CPAM vendors to seamlessly connect to Enterprise customers who are using VPAM, without requiring Vendor Rep accounts to be created on the Enterprise server. The Nexus brokers streamlined, secure connections directly through your CPAM server without changing your workflow.
Architecture Overview
The Nexus does not act as the connectivity source, but as a central broker between a vendor (CPAM) and an enterprise (VPAM). The actual connection originates from your environment (the vendor rep's workstation in CPAM) which preserves your authentication model, user management, and audit data.
When a Nexus connection is initiated:
-
Your tunnel first checks in with the Nexus Server to validate the relationship between vendor and customer.
-
The Nexus verifies that access is enabled on the Enterprise server.
-
If valid, the connection tunnels directly between your CPAM server and the Enterprise server, connecting you to the applications and endpoints you need.
Start a Connection
To make a connection to your VPAM customer, follow these steps:
-
Log in to your CPAM server.
If you're in the New UI, click Switch to Legacy UI in the top right corner.
-
Navigate to your Nexus Applications.
You may need to Request Access.
- Complete the connection workflow described in the Connection Manager section of this document.
-
When the session launches, you will connect through the VPAM's Gateway to the defined endpoints you have access to.
If you are logged in with a user that has the same email address on both the Vendor and VPAM servers, launching the Connection Manager may result in a connection error
Resolution:
-
Contact your CPAM administrator to confirm your email/user account does not exist across servers.
-
If necessary, contact the VPAM administrator.
MFA configuration changes can break the connection between CPAM users and the Nexus application if not configured properly.
Resolution:
-
Confirm MFA is properly configured for your CPAM user before enabling Nexus MFA.
-
Contact your administrator to verify Nexus connectivity.
If applications or Gatekeeper Groups are not visible on the vendor server:
-
Ensure both servers are connected to the Nexus
-
Confirm DBSYNC messages are present for the specific application or Gatekeeper Group.
This typically requires administrator validation.
Administrators should verify:
-
The CPAM/VPAMservers are connected to Nexus, the Gateways are online, and the Application's Access Schedule is enabled.
-
The
RSS_NEXUSkey is present. -
Hostname/IP is accessible from Nexus.
The following list contains the most common error messages and their meaning:
-
Your vendor rep account on the remote server is disabled: The VPAM System Admin must enable the Vendor Rep's account. Contact your customer to solve the issue.
-
Vendor rep does not belong to the vendor: The VPAM System Admin set up a second profile for the Nexus Connection and the Vendor Rep's account sits under the local profile. Contact support@imprivata.com to request assistance.
-
Remote application is unavailable: Either the Nexus application was removed from your profile or the VPAM Gateway is offline. Contact support@imprivata.com to request assistance.
If issues persist, contact support@imprivata.com.
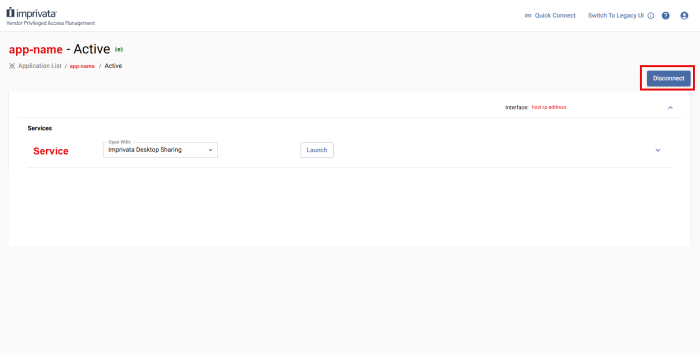
After you have successfully finished your actions in a session, ensure that you click Disconnect to actively end the session. This action terminates your active service tunnel while preserving the session if other participants remain connected.
When a session fully terminates, VPAM performs the following backend actions:
-
The encrypted tunnel between the Gateway and the VPAM server is closed.
-
All associated services are stopped
-
Audit recording is finalized.
-
All credential leases (including pooled or injected credentials) are released back to their source.
-
HTTP token credentials are invalidated.
-
Session status updates from Connected to Complete.
The finalized session record (which includes access details, participant information, and audit logs) is then written to History for compliance and reporting purposes. You can see all your sessions information in the History tab of your VPAM interface.
The best practice is to always Disconnect from a session and not rely on closing the browser windows or tabs. This guarantees proper resource cleanup, credential handling, audit integrity, and clear session closure across all session types.
Credentials
During a session, Vendor Reps can run services in their customer's assets. Depending on the Session Type, you can run Different Services.
Some services in a session may require credentials for accessing and using the service. The required credentials are never directly available nor visible for Vendor Reps, as they are stored in the customer's vault.
Depending on the configuration of the VPAM server, some of these credentials can be automatically and secretly injected into the services that you use.
The following table outlines if a service uses credential injection:
| Service Type | Connection Manager Session | Browser-Based Session |
|---|---|---|
| RDP | Yes | Yes |
| SSH | Yes | Yes |
| Telnet | Yes | Not available |
| FTP / SFTP | Yes | Not available |
| VNC & Desktop Sharing | Yes | Not available |
| HTTP / HTTPS | Partially | Not available |
| Database Services |
No |
Not available |
| Custom Services | No | Not available |
- HTTP / HTTPS credential injection is possible, but with several limitations. Reach out to your VPAM System Administrator with further questions.
- Database and Custom Services do not support injection of credentials, so manual login will be required.