Configuring the SAML Workflow with Omnissa Horizon View
Imprivata OneSign SAML Workflow Introduced
Configuring the SAML workflow eliminates the need to send an encrypted user name and password between Imprivata Enterprise Access Management and Omnissa Horizon View when authenticating Enterprise Access Management users. When the SAML workflow is enabled:
- Enterprise Access Managementfunctions as the Identity Provider — During user authentication, the Imprivata agent requests a SAML artifact from the Imprivata appliance.
- Omnissa Horizon View functions as the Service Provider — The Imprivata agent use the SAML artifact to authenticate the user to the Horizon Client. The Omnissa Horizon Connection Server validates the SAML artifact with the Imprivata appliance.
NOTE: The Enterprise Access Management SAML Workflow is not supported in offline mode.
Before You Begin
Before you begin:
-
Review the Imprivata Enterprise Access Management for SSO Supported Components to confirm that your Omnissa environment meets the minimum requirements to support SAML authentication with Enterprise Access Management.
-
The following assumes that an Imprivata single-user agent (type 1) or an Imprivata shared–kiosk workstation (type 2) is installed on the computers that employees use to access their entitled resources. For complete details, see Installing and Configuring Support for Omnissa Horizon Virtual Desktops or Configuring Support for Omnissa Horizon View RDS Hosted Applications.
Configuring the SAML Workflow
Configuring the SAML workflow requires that you:
To configure the Omnissa Horizon Connection Server:
- Note the fully qualified domain name (FQDN) of a single Imprivata appliance in the enterprise. This information is required to configure the connection.
- See "Configure a SAML Authenticator in View Administrator" in the Omnissa Horizon documentation to configure the connection. When configuring the connection, be sure to select Dynamic for the type of connection and enter the Metadata URL as follows:
https://<fqdn_of_imprivata_appliance>/sso/vmware/idp/SAML2
The Omnissa Horizon Connection Server is configured to use Enterprise Access Management as an external identity provider.
Establish the trust relationship between Enterprise Access Management and Omnissa Horizon View by importing the following certificates into the View Connection Server host certificate store:
- The Enterprise Access Management root CA certificate.
- The server certificate from each Imprivata appliance in the enterprise.
Step 2a: Export the Root CA Certificate and Server Certificates
To export the required certificates:
- In the Imprivata Admin Console, click the certificate (lock) icon on the address bar.
- Click View certificates to open the Certificates window.
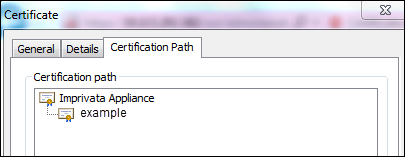
- Open the Certification Path tab. The root CA certificate is listed as the parent of the server certificate. For example:
- Select the root certificate and click View Certificate.
- Click Copy to File to open the Certificate Export Wizard.
- In the Certificate Export Wizard, click Next, select Base-64 encoded X.509 (.CER), and then click Next.
- Name and save the file to a location that is accessible to the View Connection Server host.
- Return to the Certificates window and export the server certificate using the same encoding format.
NOTE: For every other Imprivata appliance in the enterprise, use the above steps to export the server certificate only.
Step 2b: Install the Certificates into the Omnissa Horizon Server Host Certificate Store
Install the SAML root certificate
- Log in to the View broker as the administrator.
- Double click the root certificate.
If the certificate is saved as a test file: Right click the certificate and open with Crypto Shell Extensions. The Welcome to the Certificate Import Wizard page opens. - Select Local Machine and click Next. The Certificate Store page opens.
- Check Place all certificates in the following store. Browse and select Trusted Root Certificate Authorities. Click Next. The Completing the Certificate Import Wizard page opens.
The root certificate appears in the "You have specified the following settings" box. - Click Finish.
Install the SAML appliance certificate
- Log in to the View broker as the administrator.
- Double click the appliance certificate.
If the certificate is saved as a test file: Right click the certificate and open with Crypto Shell Extensions. The Welcome to the Certificate Import Wizard page opens. - Select Local Machine and click Next. The Certificate Store page opens.
- Check Place all certificates in the following store. Browse and select Personal. Click Next. The Completing the Certificate Import Wizard page opens.
Now, the root and appliance certificates appear in the "You have specified the following settings" box. - Click Finish.
To enable the SAML workflow:
- In the Imprivata Admin Console, go to the Computers menu > Virtual desktops page.
- Do one of the following:
- Go to the Omnissa Horizon – Desktops section and select Use SAML authentication.
- Go to the Omnissa Horizon – Apps section and select Imprivata SAML credentials from the Authenticate using menu.
- Click Save.
The SAML workflow is enabled.