Optional — Advanced Authentication with nFactor
Preserving Your Current NetScaler Login Experience
Imprivata Enterprise Access Management (formerly Imprivata Confirm ID) Remote Access with Citrix NetScaler uses a rewrite policy to replace the NetScaler default login screen with an Imprivata-powered graphical login screen. The integration script points Citrix NetScaler to the Imprivata Cloud to grab the Imprivata user interface.
Enterprise Access Management for MFA supports Basic Authentication by default.
However, only CItrix NetScaler nFactor (Advanced Authentication) can handle:
-
policy-based authentication (off premises or on premises)
-
including additional factors (sending the user domain as a separate value, for example)
This topic describes how to configure NetScaler to complete Advanced Authentication and transfer user credentials to the Imprivata login page to complete two-factor authentication.
Create the LDAP Server
Create the LDAP server receive and cache the username and password, then send the result of the authentication + the RADIUS secure token from Enterprise Access Management to NetScaler:
-
In the Citrix NetScaler console, go to Security > AAA - Application Traffic > Policies > Authentication > Advanced Policies > Actions > LDAP > Add
-
Give the LDAP server a descriptive name, and enter your existing settings here.
-
Click Create.

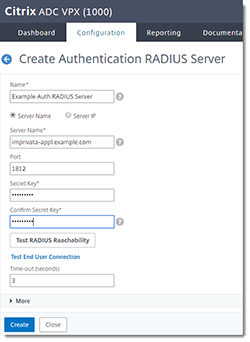
Create the RADIUS Server
Create the RADIUS server to send the secure token from Enterprise Access Management to NetScaler.
In the Citrix NetScaler console, go to Security > AAA - Application Traffic > Policies > Authentication > Advanced Policies > Actions > RADIUS > Add
| Name | Give your server a descriptive name. | |
| Port | 1812 | |
| Secret Key | Enter the Secret Key, and again in the Confirm Secret Key field. |
This is the same key as the "encryption key" entered in the Imprivata Admin Console > Applications > Remote access integrations. |
| Time-out (seconds) | 3 |
Click Create.
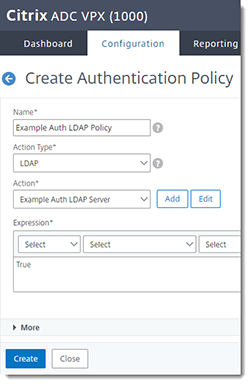
Create the LDAP Authentication Policy
In the Citrix NetScaler console, go to Security > AAA - Application Traffic > Policies > Authentication > Advanced Policies > Policy > Add
| Name | Give the policy a descriptive name. |
| Action Type | LDAP |
| Action | Select the LDAP server you created above. |
| Expression | True |
Click Create.
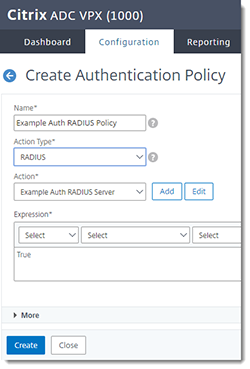
Create the RADIUS Authentication Policy
In the Citrix NetScaler console, go to Security > AAA - Application Traffic > Policies > Authentication > Advanced Policies > Policy > Add
| Name | Give the policy a descriptive name. |
| Action Type | RADIUS |
| Action | Select the RADIUS server you created above. |
| Expression | True |
Click Create.
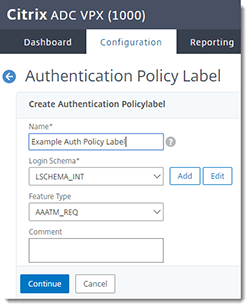
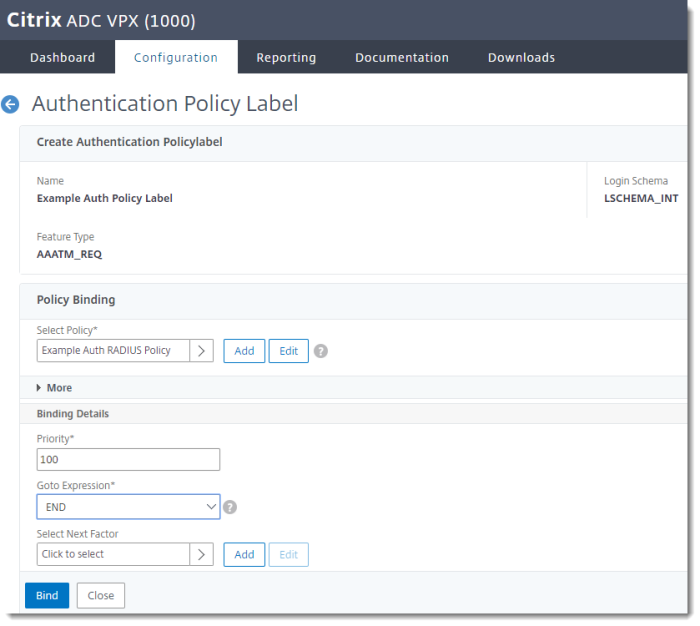
Create the Authentication Policy Label
To send the LDAP authentication approval to the next step (RADIUS authentication), create the Authentication Policy label and bind it to the RADIUS policy:
In the Citrix NetScaler console, go to Security > AAA - Application Traffic > Policies > Authentication > Advanced Policies > Authentication Policy Labels > Add
| Name | Give the label a descriptive name. |
| Login Schema | No schema is needed here. The "no schema" value = LSCHEMA_INT |
| Feature Type | AAATM_REG |
Click Continue.
Bind the Authentication Policy Label
Bind the policy label to the RADIUS policy:
-
In the Citrix NetScaler console, go to Security > AAA - Application Traffic > Policies > Authentication > Advanced Policies > Authentication Policy Labels > Bind
-
Select the RADIUS policy you created above.
-
Priority — 100
-
Goto Expression — END
-
Click Bind.
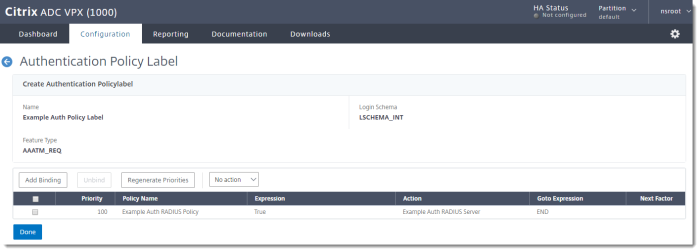
Complete the Authentication Policy Label
-
In the Citrix NetScaler console, go to Security > AAA - Application Traffic > Policies > Authentication > Advanced Policies > Authentication Policy Labels
The Login Schema, RADIUS policy, and Feature Type are now listed in the Authentication Policy Label.
- Click Done.
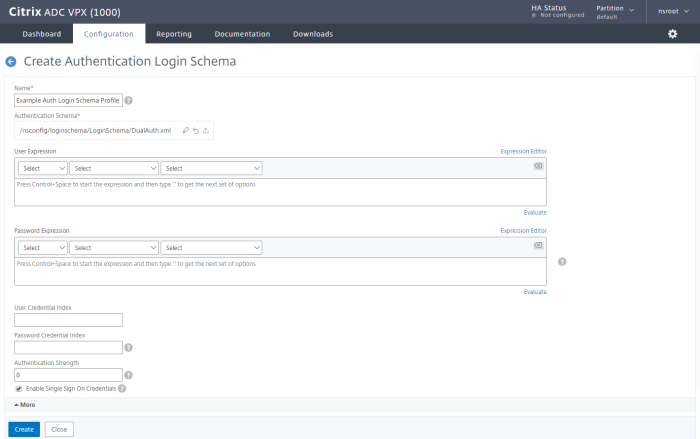
Create the Login Schema Profile
To tell the AAA server how the users should authenticate, create the login schema profile:
-
In the Citrix NetScaler console, go to Security > AAA - Application Traffic > Login Schema > Profiles > Add
Name Give the profile a descriptive name. Authentication Schema Select a Dual Authentication schema XML file. You can select an existing file from a list. The IDs of the three fields must be login, passwd, and passwd1. Enable Single Sign On Credentials Select -
NOTE:
Selecting Single Sign On Credentials is used to pass usernames and passwords to SSO applications and resource services such as Citrix StoreFront. When AAA is used for authentication, the user's credentials are not passed back to the remote access virtual server by default. By enabling Single Sign On Credentials here, user credentials will be sent back to the Remote Access Virtual Service.
-
Click Create.
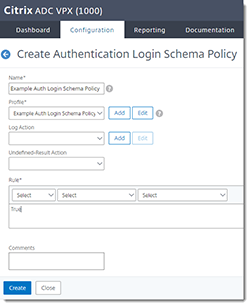
Create the Login Schema Policy
-
In the Citrix NetScaler console, go to Security > AAA - Application Traffic > Login Schema > Policies > Add
Name Give the policy a descriptive name. Profile Select the login schema profile you created above. Rule True - Click Create.
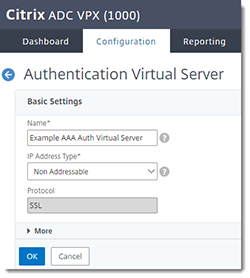
Create the AAA Virtual Server
-
In the Citrix NetScaler console, go to Security > AAA - Application Traffic > Authentication Virtual Servers > Add
Name Give the server a descriptive name. IP Address Type Non-Addressable Protocol SSL -
Click OK.
Since the AAA virtual server is local, this server can be non-addressable and does not require an SSL server certificate.
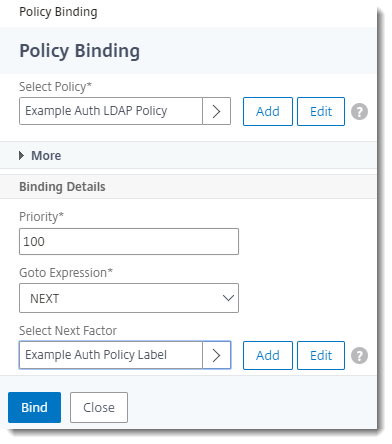
Add the LDAP Policy to Bind
-
In the Citrix NetScaler console, go to Security > AAA - Application Traffic > Authentication Virtual Servers > Advanced Authentication Policies > Authentication Policy
Select Policy Select the LDAP policy you created above. Priority 100 Goto Expression NEXT Select Next Factor Select the Authentication Policy Label you created above. - Click Bind.
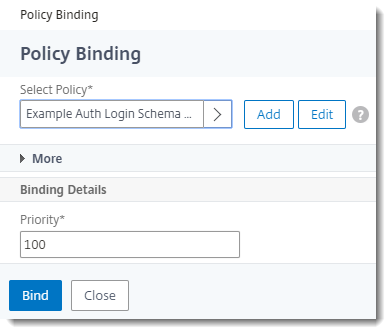
Bind the Schema Policy
-
In the Citrix NetScaler console, go to Security > AAA - Application Traffic > Authentication Virtual Servers > Login Schemas > Login Schema > Policies > Select
- Select the Login Schema Policy you created above.
- Click Select.
- Go to Policy Binding.
- Click Bind.
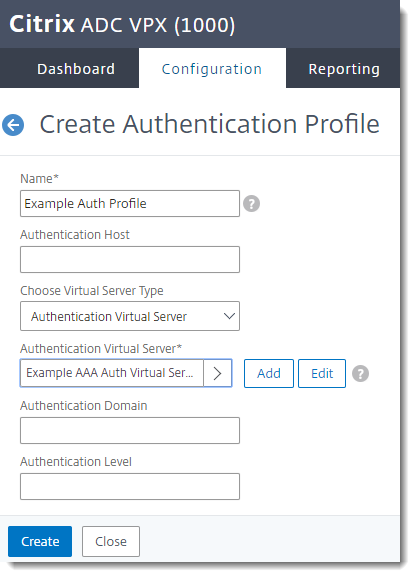
Create the Authentication Profile
Create the profile for Advanced Authentication on the AAA server. This profile is used on the VPN virtual server to send users to the AAA server:
-
In the Citrix NetScaler console, go to Security > AAA - Application Traffic > Authentication Profile > Add
Name Give the profile a descriptive name. Choose Virtual Server Type Authentication Virtual Server Authentication Virtual Server Select the AAA virtual server you created above. - Click Create.
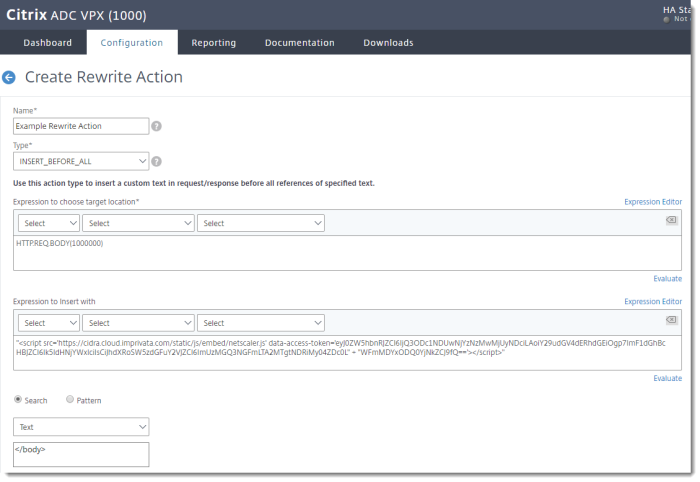
Create the Rewrite Action
The rewrite action inserts Imprivata's graphical login screen for users to complete Imprivata Confirm ID authentication. In the Citrix NetScaler console, go to AppExpert > Rewrite > Rewrite Actions > Add.
Configure the fields as follows:
| Name | Example Rewrite Action
|
Give your rewrite action a descriptive name. |
| Type | INSERT_BEFORE_ALL
|
Inserts the expression before the search text. |
| Expression to choose target location | HTTP.REQ.BODY(1000000)
|
1 million characters in the HTTP response body. |
| Expression to insert with | Enter the integration script here. | The integration script is available on the Imprivata Admin Console > Applications > Remote access integrations page. |
| Search type = Text | </body>
|
|
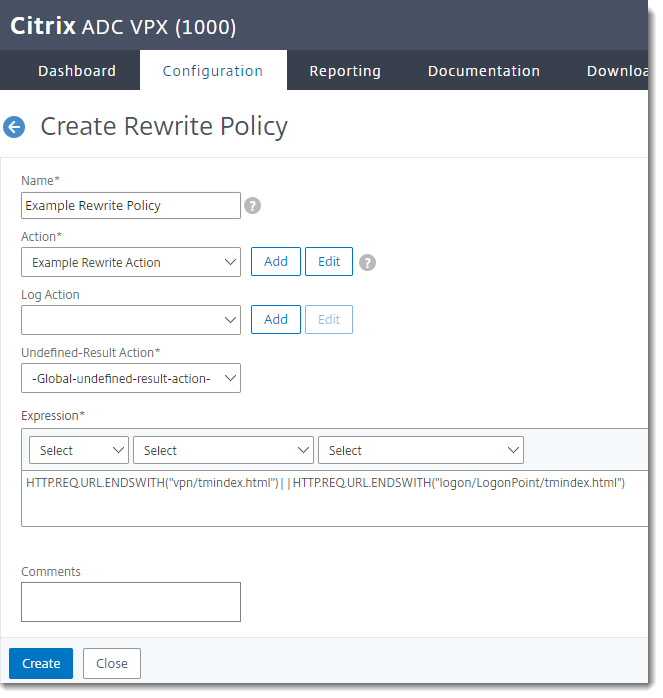
Create the Rewrite Policy
-
In the Citrix NetScaler console, go to AppExpert > Rewrite > Rewrite Actions > Add
Name Give the rewrite policy a descriptive name. Action Select the rewrite action you created above. Undefined Result Action -Global-undefined-result-action- Expression HTTP.REQ.URL.ENDSWITH("vpn/index.html")||HTTP.REQ.URL.ENDSWITH("logon/LogonPoint/index.html")If expression is true, then the rewrite action is performed: This will ensure the rewrite action is only triggered on pages that end with these strings:
vpn/index.html— Default login, Green Bubble login, and X1 login pagelogon/LogonPoint/index.html— RfWebUI login page
-
Click Create.
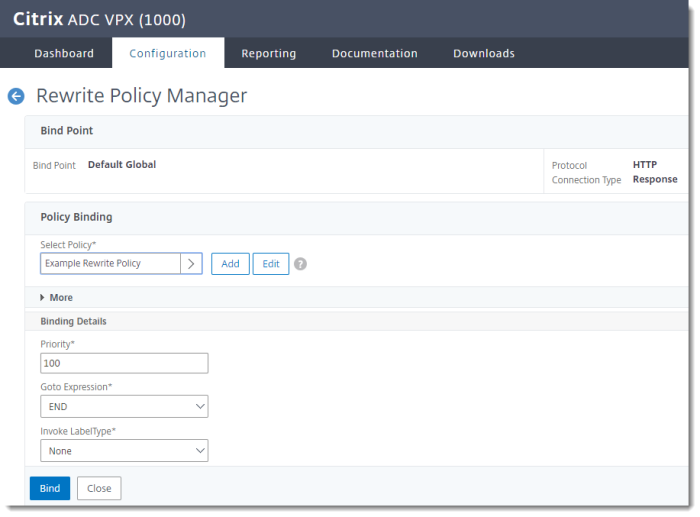
Bind the Rewrite Policy Globally
-
In the Citrix NetScaler console, go to AppExpert > Rewrite > Rewrite Actions > Policy Manager > Add Binding
Select Policy Select the rewrite policy you created above. Priority 100 Goto Expression END Invoke LabelType None -
Click Bind.
Bind AAA Authentication Policy to Gateway Virtual Server
Bind the policy to the server at Citrix Gateway > Citrix Gateway Virtual Servers > Authentication Profile > Bind